The Engineering Behind the Glide
A sliding patio door is a marvel of mechanical engineering that most homeowners take for granted until the moment it refuses to budge. We often treat these massive glass panels as simple movable walls, but in reality, they are precision instruments balanced on a knife-edge. When a door becomes crooked, it is not just an aesthetic nuisance; it is a thermal catastrophe and a security vulnerability. As a master glazier, I have seen thousands of these units, and the problem is rarely the glass itself. It is the relationship between the sash, the rollers, and the rough opening.
I remember a specific case in a drafty lakeside home where the owner was convinced they needed to replace windows throughout the entire back of the house. They complained that the sliding door was impossible to lock and that a literal breeze was blowing through the side jamb. Upon inspection, I did not find a broken seal or a warped frame. Instead, I found a pile of sawdust and a ruined floor. The previous installer had failed to level the sill pan properly, causing the entire unit to sit at a three-degree tilt. Over five years, the door had been grinding against the track, shedding metal shavings and allowing moisture to bypass the weep holes. This was not a product failure; it was an installation autopsy waiting to happen.
“The installation of a fenestration product shall be performed in a manner that maintains the structural integrity of the rough opening and ensures the unit remains level, plumb, and square to allow for proper operation.” ASTM E2112 Standard Practice for Installation of Exterior Windows and Doors
The Anatomy of the Misalignment
To fix a crooked door, you must first understand the physics of the frame. Most sliding doors in North American climates are subject to extreme thermal expansion and contraction. In a cold environment, the U-factor is the primary metric of concern. The U-factor measures the rate of heat loss, and a misaligned door creates a massive thermal bridge. When your door is crooked, the weatherstripping at the interlocker (the vertical section where the fixed and sliding panels meet) fails to engage. This creates a vertical chimney effect, drawing cold air in at the bottom and pushing warm air out at the top. This gap is often where homeowners mistakenly think they need a window cleaner to remove ‘grime’ that is actually oxidized aluminum or atmospheric soot pulled in by the draft.
Before you reach for a screwdriver, you must diagnose whether the issue is a settled foundation, a deflected header, or simply worn rollers. Take a tape measure and check the diagonals of the frame. If the measurement from the top-left corner to the bottom-right corner is not identical to the top-right to the bottom-left, your frame is ‘racked.’ This often happens when the house settles or if the original shims have rotted out. If the frame is square but the door is still crooked, the fault lies with the rollers or the track.
The Technical Protocol for Realignment
The adjustment process begins at the bottom of the operable sash. Most modern vinyl and fiberglass doors have two adjustment ports covered by plastic plugs. These ports lead to the roller housings. Inside, a tandem roller assembly sits on a pivot. By turning the adjustment screw, you are physically raising or lowering the wheel relative to the housing. This is a delicate operation. If you over-tighten, you risk stripping the threads of the housing, which usually necessitates a full sash removal to perform a window repair.
First, clear the track of all debris. This is where a professional window cleaner or a high-powered vacuum is essential. Even a small pebble can jump the roller off the track, leading to a permanent flat spot on the nylon wheel. Once the track is clear, have an assistant slightly lift the weight of the sash using a flat pry bar. This removes the 120-pound load from the adjustment screw, allowing you to turn it without resistance. Turn the screw clockwise to raise that side of the door. You are looking for a uniform gap between the door sash and the side jamb. If the top of the door hits the jamb before the bottom, you need to raise the roller on the leading edge or lower the roller on the trailing edge.
“Proper field adjustment of hardware is a critical component of the installation process. Failure to adjust rollers and strikes can lead to premature seal failure and increased air infiltration rates.” AAMA Installation Masters Guide
Thermal Dynamics and the Interlocker
Why does a 1/8-inch misalignment matter so much? In cold climates, we rely on Low-E coatings on Surface #3 of the glass to reflect long-wave infrared radiation back into the room. However, no amount of high-tech glazing can compensate for air bypass. Sliding doors use a specialized component called an interlocker. These are hooked aluminum or vinyl extrusions that ‘clasp’ together when the door is closed. When the door is crooked, these hooks do not fully engage. This creates a bypass for air and sound. If you can hear the wind whistling or see light through the middle of your closed doors, your alignment is the culprit, not the glass performance.
Furthermore, in regions with high humidity, a misaligned door allows warm, moist indoor air to hit the cold surface of the outer track. This leads to condensation, which eventually turns into mold. I have seen many homeowners attempt to solve this with a simple window repair kit from a big-box store, but without addressing the geometry of the sash, they are merely masking the symptoms. A properly aligned door should operate with the touch of a single finger. If you have to use your body weight to slide the door, you are destroying the weatherstripping and the rollers.
When Adjustment is Not Enough
There are times when the adjustment screws reach their limit and the door remains crooked. This is the ‘point of no return’ for many units. It usually indicates that the rollers have collapsed or the track itself has been crushed. In aluminum doors, the track is often part of the frame extrusion, meaning a dented track might require a professional to file the metal back to a true point. In vinyl units, many manufacturers use a stainless steel track cover that can be replaced. If the frame itself has bowed due to structural pressure from an undersized header, you may need to replace windows or the entire door unit entirely. A deflected header is a serious structural issue that no amount of roller adjustment can fix.
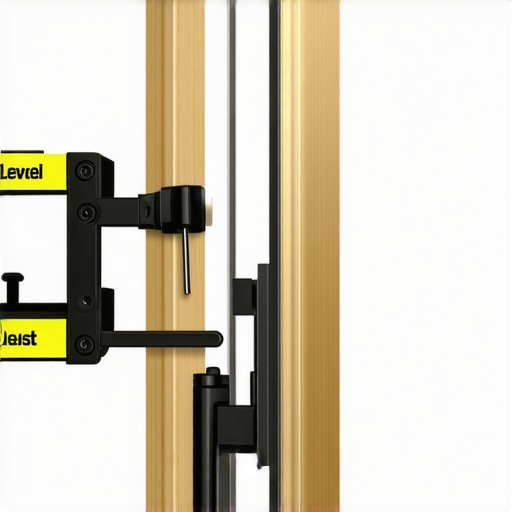
To test this, place a long level against the underside of the top frame. If there is a ‘smile’ or a ‘frown’ in the frame, the weight of the house is resting on your door. This is common in older homes where the structural wood has dried and shrunk over decades. In these scenarios, the only solution is to remove the unit, repair the framing, and reinstall a new, high-performance door with a proper sill pan and flashing tape to ensure a water-tight seal.
Final Validation of the Seal
Once you have adjusted the rollers so the sash is square to the jamb, you must check the lock alignment. A crooked door often results in a ‘sticky’ lock because the latch is not hitting the center of the strike plate. Do not move the strike plate first. Always align the door to the frame first, then move the strike plate as a final step. Check the weep holes at the bottom of the exterior track. If the door is sitting too low because you lowered the rollers to level it, you might be blocking the drainage path. A blocked weep hole leads to water backing up over the interior track and into your subfloor. This is the silent killer of many sliding doors. In summary, a sliding door is a system of balances. Respect the physics of the weight, the geometry of the frame, and the necessity of the seal. If you manage these three factors, your door will provide decades of service without the need for a premature replacement.
How to Re-Align a Sliding Patio Door
Clean the Track
Use a vacuum and a stiff brush to remove all grit, pet hair, and debris from the bottom track to ensure the rollers have a smooth surface.
Locate Adjustment Ports
Find the two holes at the bottom of the sliding sash. They may be covered by small plastic caps that need to be popped off with a flathead screwdriver.
Relieve Sash Pressure
Have an assistant lift the door slightly using a pry bar to take the weight off the rollers while you make adjustments.
Adjust the Rollers
Insert a screwdriver into the port. Turn clockwise to raise the door or counter-clockwise to lower it. Adjust until the gap between the sash and the side jamb is uniform from top to bottom.
Verify the Lock and Interlocker
Close the door and ensure the lock engages smoothly. Check that the vertical interlocker in the middle of the unit is tightly sealed.