The Philosophy of the Glazing Bed
In the world of high-end fenestration, we do not simply see a window as a piece of glass; we see a sophisticated moisture management system. For those of us who have spent decades in the trade, the sight of a 100-year-old wood sash is a testament to the durability of old-growth timber and traditional craftsmanship. However, even the finest cedar or Douglas fir sash eventually requires maintenance. Removing old, rock-hard putty is the first and most critical step in a successful window repair. If you approach this with a hammer and a standard screwdriver, you are not a glazier; you are a demolition contractor. To do this right, you must understand the thermal dynamics and the structural integrity of the muntin profiles that hold the glass in place.
I remember a specific job in an old historic district where I was called in to fix a ‘botched’ restoration. The previous contractor had pulled a sash out of its rough opening and, in an attempt to move fast, used a high-powered heat gun without a shield. He didn’t just soften the putty; he charred the wood and cracked the original cylinder glass. I looked at the blackened header and the scorched wood fibers and realized the entire structural integrity of the joinery was compromised. This is what happens when you treat a delicate restoration like a replace windows project. You cannot rush the thermal softening of linseed-oil-based glazing compounds without risking permanent damage to the wood substrate.
The Science of Linseed Oil and Calcification
Glazing putty is a mixture of whiting (calcium carbonate) and linseed oil. Over sixty or seventy years, the oil leaches out into the wood or evaporates, leaving behind a brittle, stone-like substance. This calcified mass is often stronger than the wood itself, particularly if the wood has been exposed to moisture and has begun to soften. Before you even touch a tool, you must assess the condition of the wood. Is it punky? Is there evidence of weep hole blockage in the sill? If the wood is soft, your putty removal strategy must be even more surgical.
“Installation is just as critical as the window performance itself. A high-performance window installed poorly will fail.” – AAMA Installation Masters Guide
This industry standard applies to restoration just as much as new construction. If you fail to remove the old putty properly, the new glazing bed will not adhere, leading to air infiltration and water intrusion. In cold northern climates, this is a disaster. When we talk about the U-Factor in a restored window, we are looking for a tight seal that prevents warm, moist indoor air from hitting the cold glass surface. If your putty bed is compromised, you will get condensation inside the rebate, leading to rot from the inside out.
Tools of the Trade: Beyond the Putty Knife
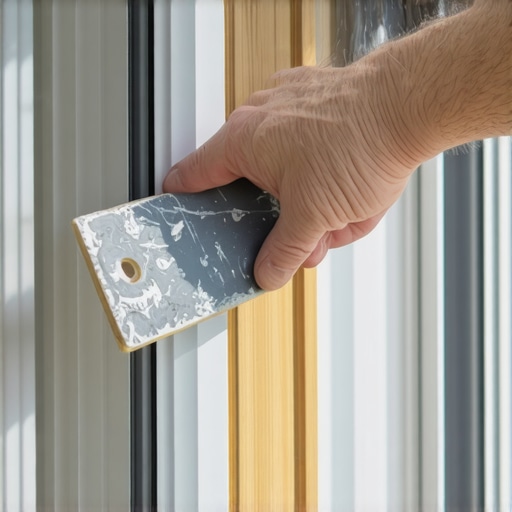
To remove putty without scarring the wood, you need to move beyond the basic hardware store kit. A professional uses an infrared heat stripper or a steam box. Why? Because these tools heat the putty from the inside out without reaching the wood’s ignition temperature. A standard heat gun can reach 1100 degrees Fahrenheit, which is far too hot for old, dry wood. You want a controlled 250 to 300 degrees. This softens the putty to a peanut-butter consistency, allowing it to be lifted out with a glazing bead scraper or a dedicated hacking knife.
You must also consider the glazier’s points. These are the small metal triangles driven into the wood to hold the glass before the putty is applied. If you drag a scraper across a hidden point, you will jump, and that jump usually leads to a gouge in the wood or a crack in the glass. I use a rare-earth magnet to locate these points under the putty before I begin my first pass. It is this level of precision that separates a master from an amateur. Once the putty is removed, the wood must be treated immediately. If you leave bare, old-growth wood exposed, it will begin to suck moisture from the air, changing its dimensions and potentially throwing the operable sash out of square.
The Thermal Logic of the Wood Sash
In Minneapolis or Chicago, where the winter wind-chill can drop well below zero, the wood window is a thermal hero. Wood has a much lower thermal conductivity than aluminum and even most vinyl. When we restore these units, we are often looking to improve the U-Factor. This is why we pay so much attention to the bedding putty. The glass doesn’t just sit on the wood; it floats on a thin layer of putty that acts as a thermal break and a gasket. If you scrape away too much wood during the putty removal, you create a gap that the new putty cannot effectively fill, leading to a thermal bridge.
“Thermal performance of the glazing system is dependent upon the continuous seal of the glass to the frame, ensuring that the dew point remains outside the primary structure.” – NFRC Technical Manual
When the putty is gone, use a high-quality window cleaner to strip the glass of any remaining oils or residue. This is not about aesthetics; it is about chemistry. If there is a film of old oil or window cleaner chemicals on the glass or the wood rebate, the new glazing compound will not form a molecular bond. I prefer using a 50/50 mix of denatured alcohol and water for this task, as it evaporates quickly and leaves no residue. This ensures that the new seal is air-tight and water-tight, protecting the wood for another fifty years.
The Step-by-Step Surgical Extraction
Begin by securing the sash on a flat, stable work surface. If the sash is still in the rough opening, you are working against gravity and at a significant disadvantage. Apply your heat source in short bursts, focusing on a six-inch section at a time. Use a shim to check the softness of the putty before applying pressure with your scraper. As the putty softens, use a pull-scraper rather than a push-chisel. Pulling gives you more control and prevents the tool from burying itself in the grain of the wood. Once the bulk of the material is removed, you will see the glazing bead area. This is where the most care is needed. The muntins are the thinnest part of the window, and a single slip can snap a piece of history that cannot be easily replaced.
After the glass is out and the rebate is clean, sand the wood lightly with 100-grit paper to open the pores. Do not use power sanders here; you want to preserve the sharp edges of the profile. Treat the raw wood with a coat of boiled linseed oil diluted with mineral spirits. This ‘primes’ the wood so that it doesn’t immediately suck the life out of your new putty. If you skip this, your new putty will dry out and crack within two years. This is the difference between a repair that lasts a season and a restoration that lasts a lifetime.
When Restoration Becomes Replacement
I often have to explain to homeowners that while I love a good restoration, there is a point of no return. If, after removing the putty, you find that the bottom rail is more epoxy than wood, or if the sill pan has failed and the structural jack studs are rotting, it may be time to replace windows. However, don’t be swayed by the high-pressure sales pitch of the ‘insert’ window companies. A pocket replacement window reduces your glass area and often ignores the underlying rot in the original frame. If you must replace, look for full-frame replacements that allow you to install proper flashing tape and a functional drip cap.
In the end, whether you are meticulously removing putty with an infrared heater or deciding to upgrade to a modern high-performance unit, the goal is the same: water management. A window is a hole in a perfectly good wall, and your job is to make sure that hole doesn’t let the outside in. By treating the putty removal process with the respect it deserves, you are preserving the thermal envelope of the home and the architectural integrity of the structure. Take your time, use the right heat, and always respect the grain of the wood.