The Master Glazier Perspective on Site Negligence
In twenty-five years of handling high-performance glazing, I have seen it all. I have seen thousand-dollar sashes treated like saw horses and triple-pane units used as leaning posts for ladders. But nothing raises my blood pressure quite like a ‘caulk-and-walk’ crew that leaves a beautiful new installation covered in acrylic overspray or, worse, oil-based primer. Most people think a window is just a piece of glass. They are wrong. It is a precision-engineered thermal barrier designed to manage the dew point and maintain the thermal envelope of a building. When you introduce construction paint into that equation, you are not just dealing with a cosmetic blemish; you are dealing with a potential failure of the glazing system.
“Installation is just as critical as the window performance itself. A high-performance window installed poorly will fail.” – AAMA Installation Masters Guide
I remember a specific job in Boston where I was called in to inspect a series of failing casements. I pulled a vinyl window out of a house where the header was completely black with rot. Why? The previous installer relied on the nailing fin instead of proper flashing tape and a dedicated sill pan. Water had been wicking behind the flange for years. The homeowner was furious, but the root cause was the same laziness that leads to paint-splattered glass: a total lack of respect for the materials. When I see a window covered in construction debris, I know the installer didn’t value the rough opening tolerances or the delicate nature of the glass surfaces.
The Molecular Reality of Glass and Paint
To understand how to remove paint, you must understand what you are working with. Modern window glass is an amorphous solid, often a soda-lime-silicate composition. While it feels perfectly smooth to the touch, at a microscopic level, it has peaks and valleys. When paint is sprayed or brushed onto a new window, the resins in the paint—whether they are acrylic, latex, or alkyd—flow into these microscopic voids. As the paint cures, it forms a mechanical bond with the glass surface. This is why you cannot simply ‘wipe’ it off. You need to break that bond without gouging the silicate structure.
In cold climates like the Northeast or Midwest, where we prioritize a low U-Factor and high thermal resistance, we often use windows with Low-E (low-emissivity) coatings. These are microscopic layers of silver or other metals. If that coating is on Surface #1 (the exterior-facing side), using the wrong cleaning technique will ruin the thermal performance of the unit instantly. You aren’t just cleaning; you are performing surgery on a building’s skin. If you scratch that surface, you are creating a site for future glass corrosion or seal failure.
The Danger of Fabrication Debris (FD)
This is where the ‘pro’ separates from the ‘amateur.’ During the tempering process, glass is moved along ceramic rollers. Sometimes, tiny microscopic glass particles—known as fabrication debris—fuse to the ‘roller side’ of the glass. If you take a dry scraper to a window that has fabrication debris, you will catch those particles and drag them across the pane, creating what we call ‘scratches in a row.’ This is why a window cleaner must always use a lubricant. Never, under any circumstances, should a metal blade touch dry glass. This is the fastest way to turn a new construction project into a window repair nightmare.
“Glass is a porous material at a microscopic level. Contaminants must be emulsified before mechanical removal is attempted.” – NFRC Standards Handbook
The Step-by-Step Restoration Protocol
If you are looking to replace windows because they are ‘too dirty to save,’ stop. Most paint can be removed if you follow the master glazier’s protocol. First, you must identify the frame material. If you have vinyl frames, stay away from harsh chemical solvents like acetone or high-strength paint thinners. These chemicals can melt the PVC or cause permanent yellowing by leaching the UV stabilizers out of the frame. For wood sashes, you must be careful not to saturate the wood, which can lead to swelling and interference with the operable parts of the window.
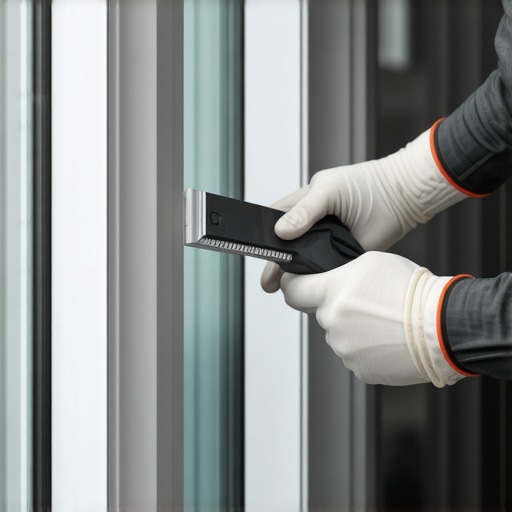
Start with a high-quality surfactant. A mixture of warm water and a specialized glass soap is best. You want to achieve a high ‘wetting’ level, where the water clings to the paint and begins to soften the resin. Apply the solution and let it dwell. Do not let it dry. While the surface is wet, use a new, stainless steel 4-inch scraper. Check the blade for burrs before you start. Hold the scraper at a 30 to 45-degree angle. This angle is critical: too shallow and you won’t get under the paint; too steep and you risk ‘pitting’ the glass. Move in one direction only. Never pull the blade backward, as this is when most scratching occurs.
Detailed Cleaning of the Glazing Bead and Muntins
The hardest part isn’t the center of the pane; it is the edges. The glazing bead—the strip that holds the glass in the sash—is often where paint accumulates. If you are too aggressive here, you can damage the seal or the ‘weep holes’ designed to let moisture escape the frame. Use a plastic putty knife or a detail brush for these areas. If you find that the paint has migrated under the glazing bead, do not try to dig it out. This can compromise the structural integrity of the glass-to-sash bond. If the paint is truly stubborn, a mild citrus-based solvent can be used sparingly on a microfiber cloth, provided it does not touch the vinyl or wood finishes for extended periods.
Thermal Considerations and Final Inspection
Once the paint is removed, you must inspect the window for more than just clarity. In a cold climate, check the warm-edge spacers. If the previous contractor was rough with the windows, they might have compromised the argon gas fill. While a scratch is bad, a blown seal is worse. Look for any signs of fogging between the panes. If you see this, the window repair is no longer about paint; it is about replacing the IGU (Insulated Glass Unit).
Ultimately, the best way to handle paint on windows is to prevent it. I tell every site supervisor that a five-dollar roll of masking film is cheaper than a three-thousand-dollar glass replacement. But if the damage is done, take your time. Respect the glass. Use plenty of lubrication. And remember that the sash you are cleaning is the only thing standing between the homeowner and a thirty-degree January night.