The Science of the Glazing Pocket
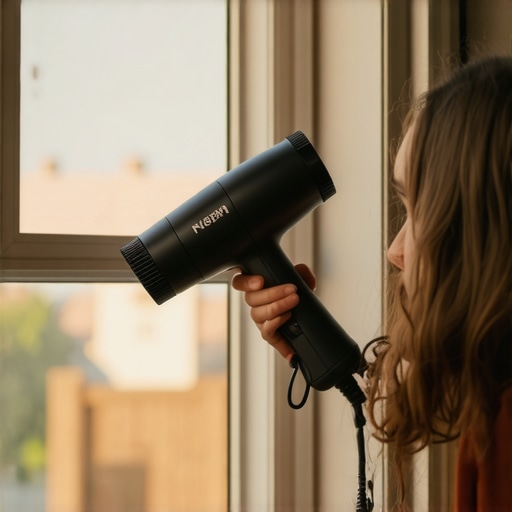
In my twenty-five years of handling glass, I have seen far too many ‘caulk-and-walk’ contractors ruin historic sashes by hammering away at petrified putty. When you are dealing with a window that has survived eighty winters, you aren’t just looking at glass and wood; you are looking at a delicate thermal ecosystem. Old-school linseed oil putty becomes brittle as its oils evaporate over decades of UV exposure. Attempting to chip it out cold is a recipe for a cracked pane or a gouged muntin. This is where the hairdryer technique comes in. Unlike a high-intensity heat gun, which can reach temperatures of 1000 degrees Fahrenheit and cause immediate thermal shock to the glass, a hairdryer provides a controlled, lower-temperature stream of air that softens the binding oils without shattering the substrate.
The Rot Repair Reality
I remember pulling a wood sash out of a Victorian home in Boston during a particularly brutal November. The homeowner complained about a persistent draft, but when I touched the bottom rail, my thumb sank right into the wood. The previous owner had tried to ‘fix’ the cracked glazing by smearing silicone over the old putty. This trapped moisture against the wood, and because the glazing bead was no longer shedding water, the rail had turned into a sponge. I had to rebuild that entire corner of the sash because someone didn’t understand that the glazing pocket is the first line of defense against rot. Proper window repair starts with removing the failure, not covering it up. If the putty is failing, the wood is at risk.
“Installation is just as critical as the window performance itself. A high-performance window installed poorly will fail.” AAMA Installation Masters Guide
Why Temperature Control Matters
In colder climates like Chicago or Minneapolis, the U-factor of a window is the metric that keeps your furnace from running 24/7. When putty cracks, it creates an air infiltration path that bypasses the glass entirely. However, you cannot just blast that area with heat. Glass has a low coefficient of thermal expansion compared to the wood frame. If you apply 500 degrees to the edge of the glass while the center remains at 40 degrees, the resulting stress will cause a stress crack. A hairdryer typically maxes out at about 140 to 160 degrees Fahrenheit. This is the sweet spot. It is warm enough to vibrate the molecules of the hardened oil but cool enough to prevent the glass from expanding at a rate that causes structural failure.
Step-by-Step: The Hairdryer Removal Method
First, ensure you have a stiff-blade putty knife and a pair of heavy gloves. Start at a corner and hold the hairdryer about two inches from the putty. Move the heat back and forth in a six-inch section. Do not hold it in one spot. You are looking for the putty to lose its chalky appearance and take on a slightly glossy sheen. This indicates the oils are becoming viscous again. Once softened, use your knife to apply steady, even pressure. If you feel resistance, stop. Apply more heat. You are working against the bond between the glass, the wood, and the glazier’s points. Once the bulk of the putty is removed, you will find the small metal triangles known as glazier’s points. These are what actually hold the glass in the sash. Use a needle-nose plier to remove them carefully.
The Anatomy of the Window Sash
Every professional glazier knows the importance of the Rough Opening and the Sill Pan, but on a repair job, we focus on the Muntin and the Glazing Bead. The muntin is the structural strip that separates the panes. When you remove putty, you must be careful not to round off the edges of the wood. If you damage the wood profile, the new putty will not have a clean line to follow, which makes the final result look amateurish. This is also a good time to inspect for weep holes in more modern storm windows that might be attached. If those are clogged, water will back up into your newly repaired sash and start the rot process all over again.
“Water penetration is the leading cause of premature window assembly failure in residential structures.” ASTM E2112 Standard Practice
Climate Logic and Solar Heat Gain
If you are performing this repair in the South, your focus is likely on the Solar Heat Gain Coefficient (SHGC). Older single-pane windows are notoriously bad at blocking radiant heat. While you have the glass out to replace the putty, consider if it is time to replace windows with modern insulated glass units (IGUs). In hot climates, we want a Low-E coating on Surface #2 to reflect heat back outside. However, if you are restoring a historic home where original glass is mandatory, your only defense is a perfect glazing seal. A tight putty line prevents the ‘chimney effect’ where hot air is sucked into the home through gaps in the window assembly.
Final Preparation and Re-Glazing
Once the old putty is gone, do not immediately apply new material. The old wood is likely thirsty and will suck the oil out of your new putty, causing it to fail prematurely. I always apply a light coat of boiled linseed oil to the wood rabbit before re-glazing. This seals the wood and ensures the new putty stays flexible for decades. After the new putty is applied and has skinned over, you will need a good window cleaner to remove the oily residue from the glass. Avoid ammonia-based cleaners on fresh putty, as they can interfere with the curing process. Use a simple vinegar and water solution to get that professional clarity.
When Repair Is Not Enough
Sometimes, during the putty removal process, you realize the Rough Opening is out of square or the Shim points have shifted so much that the sash no longer fits. If the wood is crumbly or the glass is constantly fogging due to interstitial condensation in a double-pane unit, it is time to stop repairing and start looking at replacement options. Modern fiberglass frames offer incredible stability and thermal performance that old wood simply cannot match. But for those of us who love the craft, there is nothing quite like the satisfaction of a perfectly struck putty line on a restored historic sash. It is about more than just aesthetics; it is about moisture management and thermal integrity.