The Anatomy of a Failed Seal: A Master Glazier Perspective
I recall a project in a high-wind corridor where I was tasked with a window repair assessment for a series of premium wood-clad units. The homeowner was baffled by the persistent drafts despite having paid for a top-tier installation. When I inspected the rough opening after removing the exterior trim, the reality was grim. The previous contractor had practiced what I call the ‘dump-and-run’ method. They had pumped a massive amount of low-grade sealant into the gap without any regard for the three-sided bond rule or proper tooling. The sealant had failed adhesively from the sash-adjacent frame, creating a direct path for cold air and moisture. The header was already showing signs of early-stage fungal growth because the flashing tape had been applied over sawdust rather than a clean substrate. This is why I advocate for technical precision over brute force. A window is only as good as its perimeter seal, and a professional-grade seal requires more than just a steady hand; it requires an understanding of sealant geometry.
“Installation is just as critical as the window performance itself. A high-performance window installed poorly will fail.” AAMA Installation Masters Guide
The Science of the Perimeter Joint
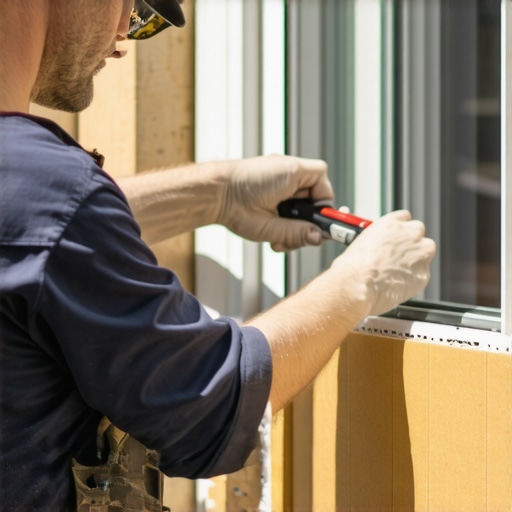
When we talk about whether to replace windows or repair them, the conversation often ignores the critical physics of the expansion joint. In northern climates, your window frames are subject to extreme thermal cycling. A vinyl frame can expand and contract significantly more than the surrounding masonry or wood siding. This movement puts immense stress on the sealant. To manage this, we must ensure the sealant is shaped like an hourglass. This allows the material to stretch and compress without tearing away from the rough opening or the window frame. This is where most DIYers and even some ‘pros’ fail. They leave the bead round or concave in a way that creates a thick center, which is the opposite of what physics demands. [image_placeholder_1]
Why a $2 Cardboard Template Outperforms Plastic Tools
You can buy expensive plastic profiling kits, but in my 25 years on the job, I have found that a custom-cut piece of rigid cardboard is the superior tool for achieving the perfect ‘wash’ on a sealant bead. The porosity of the cardboard, when slightly dampened with a specific window cleaner or a soap solution, provides just enough friction to tool the material without dragging it. To create your template, you take a scrap of heavy-duty shipping box and cut a 45-degree notch that matches the depth of your glazing bead or frame offset. This template allows you to maintain a consistent depth of the sealant across the entire operable unit. It ensures that you are forcing the sealant into the joint for maximum wet-out and adhesion while simultaneously stripping away the excess that would otherwise trap water on the sill pan. When you use this template, you are not just making it look pretty; you are ensuring that the sealant can handle the U-factor stresses of a cold winter night.
The Role of Surface Preparation
Before you even touch a caulk gun, you must address the substrate. I have seen window repair jobs fail in six months because the installer didn’t realize that old silicone residue is the ultimate ‘anti-adhesion’ coating. You must use a high-quality window cleaner that leaves zero residue to prep the glass and the frame. If you are working on a window repair, every trace of the old material must be mechanically removed. We then use a solvent wipe. This ensures that the new sealant forms a chemical bond with the frame. If you are dealing with a deep gap, you must use a backer rod. Never, under any circumstances, should you fill a deep rough opening gap entirely with sealant. The backer rod acts as a bond breaker, preventing the sealant from sticking to the back of the joint, which allows the hourglass shape to function during thermal expansion.
“The application of sealant is intended to provide a weather-tight seal between the window frame and the adjacent wall system. Proper tooling of the sealant ensures maximum contact and adhesion.” ASTM E2112 Standard Practice
Managing Heat Loss and the Dew Point
In our northern climate, the primary enemy is the migration of warm, moist interior air into the wall cavity. When air escapes through a poorly sealed window perimeter, it hits the cold exterior sheathing and reaches its dew point. This results in liquid water inside your walls. By using the cardboard template to create a perfect, tooled seal, you are creating an airtight barrier that preserves the R-value of your wall insulation. A high-performance window with a low U-factor is useless if the air is bypassing the frame entirely. We look for warm-edge spacers and muntin bars that are properly integrated, but the perimeter seal is the final line of defense. If you notice condensation on the edges of your sash, it might not be a glass failure; it could be air infiltration cooling the frame below the dew point.
The Technical Execution: Step by Step
First, evaluate if it is time to replace windows. If the wood is soft or the weep holes are clogged beyond repair, a new seal won’t save you. However, if the frame is sound, start by cutting your cardboard template to the specific profile of your glazing bead. Apply a consistent bead of high-performance polyurethane or hybrid sealant. Do not use cheap ‘painter’s caulk’ which has high shrinkage rates. Lay the bead, then immediately use your cardboard template at a 45-degree angle to tool the joint. The template will strip away the excess and leave a perfectly flat or slightly concave wash that directs water away from the sash. This method ensures that the weep holes remain unobstructed, which is vital for the drainage system of any modern window unit. If you block those holes, you are guaranteeing a rot problem within three seasons.
Final Thoughts for the Professional Finisher
The difference between a 10-year seal and a 30-year seal is found in the microns of adhesion achieved during the tooling process. Using a $2 piece of cardboard allows for a level of tactile feedback that plastic tools cannot match. It is a trick of the trade that separates the master installers from the ‘caulk-and-walk’ crews. Whether you are doing a window repair or finishing a full-frame replace windows project, the geometry of that final bead is your signature on the job. It is the difference between a home that stays dry and one that slowly rots from the inside out. Don’t trust your home’s envelope to a finger and a rag; use a template, understand the physics of the joint, and respect the rough opening requirements of the manufacturer.