The Science of Failing Adhesives and Glass Integrity
In my twenty-five years as a master glazier, I have seen every DIY disaster imaginable, but nothing quite matches the frustration of a homeowner trying to peel back ten-year-old solar film with a utility knife. I remember walking into a residence in Orlando where the sunroom was a disaster zone. The homeowner had tried to scrape off a bubbling window film in the peak of July heat, not realizing they were dealing with tempered glass that had a microscopic surface tension easily marred by metal. They ended up with a $5,000 bill for glass replacement because they didn’t understand the molecular bond of Pressure Sensitive Adhesives (PSA). The film had practically become one with the glass surface due to years of intense Solar Heat Gain. If they had simply understood the thermodynamics of the adhesive bond, we could have saved the original insulated glass units. This guide isn’t about a quick fix; it is about managing the thermal properties of your window system to ensure the sash remains intact and the glass remains clear.
“Installation is just as critical as the window performance itself. A high-performance window installed poorly will fail.” – AAMA Installation Masters Guide
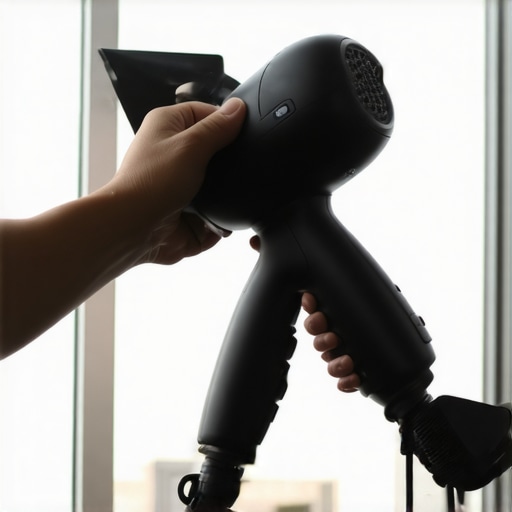
Understanding the Thermal Dynamics of the Hairdryer Trick
When we talk about the hairdryer trick, we are not just blowing hot air. We are performing a controlled application of convective heat to lower the viscosity of the PSA. Most window films use an acrylic-based adhesive that is designed to harden over time under UV exposure. By using a hairdryer, you are targeting the glass transition temperature of that adhesive. You want to reach a sweet spot of approximately 120 to 140 degrees Fahrenheit. Any higher, and you risk thermal shock, which can cause the glass to crack, especially if it is annealed glass rather than tempered. You must start at a corner of the sash and move the hairdryer in a slow, consistent motion. The goal is to soften the bond so that the film remains elastic. If the film is cold, it is brittle. Brittle film tears into thousands of tiny shards, leaving you with a nightmare of a cleanup. By keeping the film warm as you pull at a forty-five-degree angle, you allow the adhesive to release from the glass and stay on the film, which is the gold standard for any window cleaner or technician.
Why Climate Context Matters: The SHGC Factor
In hotter climates like Texas or Florida, window film is often a desperate attempt to lower the Solar Heat Gain Coefficient (SHGC) of an underperforming window. If you are removing this film, you are likely doing so because it has started to oxidize or peel. In these regions, the enemy is the sun’s radiant energy. Aftermarket films are often applied to Surface #4 (the interior side), but this creates a heat trap within the glass. This is why many manufacturers will void your warranty if you apply film. The heat gets trapped between the film and the glass, causing the internal temperatures of the IGU (Insulated Glass Unit) to skyrocket. This can eventually lead to seal failure. If you find yourself needing to replace windows frequently in the South, it is usually because the original glass lacked a proper Low-E coating on Surface #2 to reflect that heat back outside before it even enters the home. When you remove the film, pay close attention to the glazing bead. High heat can warp these plastic or vinyl strips that hold the glass in the sash, so keep your hairdryer directed at the glass, not the frame.
Technical Steps for Residue Removal and Frame Inspection
Once the film is off, the real work begins. You will likely have a hazy residue left behind. A professional window cleaner knows that you never reach for a metal scraper first. Instead, use a solution of distilled water and a few drops of dish soap, which acts as a surfactant. If the residue is stubborn, a plastic shim can be used as a gentle scraper to avoid scratching. While you are there, inspect the entire window assembly. Check the weep hole at the bottom of the frame to ensure it isn’t clogged with film debris. If you are dealing with an operable sash, ensure that the heat hasn’t affected the weatherstripping. If the glass was already showing signs of moisture between the panes before you started, no amount of film removal will help; you are looking at a window repair or a full-frame replacement. In professional installations, we look at the rough opening to ensure the window is level and plumb. If the frame is distorted, it puts uneven pressure on the glass, making film removal even more precarious due to the existing stress on the pane.
“The Solar Heat Gain Coefficient (SHGC) is the fraction of incident solar radiation admitted through a window, both directly transmitted and absorbed and subsequently released inward.” – NFRC Fact Sheet
When to Stop Repairing and Start Replacing
There comes a point where the hairdryer trick is just delaying the inevitable. If your windows are twenty years old and you are peeling off film because the rooms are still too hot, the glass technology has simply outlived its usefulness. Modern windows use warm-edge spacers and argon gas fills that provide far better insulation than a thin layer of plastic film ever could. If you decide to replace windows, look for units with high-performance flashing tape and a dedicated sill pan to prevent the kind of rot I have seen in countless teardowns. Whether you are a homeowner or a professional, remember that windows are a system of managed layers. Removing old film is the first step in restoring the clarity and performance of that system. Treat the glass with the respect its chemistry demands, and you will avoid the costly mistakes of the uninitiated. Keep your heat source moving, watch your angles, and never force a tear when a little more heat could do the work for you.