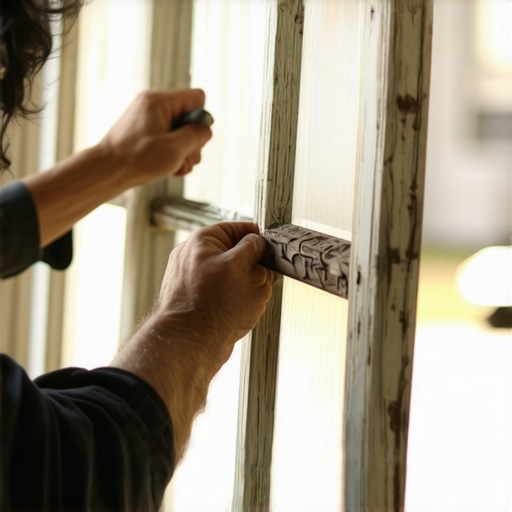
The Anatomy of a Failing Sash
In my twenty-five years as a glazier, I have seen thousands of homeowners make the same mistake: they see a cracked pane of glass and assume the entire window unit belongs in a landfill. This mindset is fueled by high-pressure sales tactics, but for those of us who understand the physics of a building envelope, a historic wood sash is a marvel of repairability. When you replace windows with modern vinyl inserts, you are often trading a hundred-year asset for a twenty-year disposable product. To properly perform a window repair on an old wooden frame, you must understand the relationship between the glass, the wood rabbet, and the glazing compound. It is a system designed to manage moisture and thermal expansion, and if any part of that system is compromised, the integrity of the wall is at risk.
“Installation is just as critical as the window performance itself. A high-performance window installed poorly will fail.” – AAMA Installation Masters Guide
I pulled a wood sash out of a 1910 Victorian house in Boston once, and the bottom rail was completely black with rot. Why? The previous owner had hired a general laborer who didn’t understand the shingle principle. They had used a cheap silicone caulk instead of traditional glazing putty. Water had gotten trapped behind the silicone, and because wood needs to breathe, the moisture stayed against the grain until the cellulose simply gave up. That is the cost of a ‘caulk-and-walk’ approach. If you want to avoid structural failure, you must follow the technical specifications of historic glazing.
The Physics of the Rabbet and the Glazing Bead
Before you even touch a glass cutter, you have to prepare the rough opening of the sash itself. In an old wooden frame, the glass sits in a recessed L-shaped groove called a rabbet. Over decades, the original linseed oil in the glazing putty dries out, becoming brittle. This creates micro-fissures where capillary action pulls rainwater into the wood. To do this right, you must strip the old compound down to the bare wood. If you leave even a trace of old, dry putty, the new compound will fail to bond, and you will be right back where you started within two seasons. This is why a window cleaner often spots the first signs of failure; they see the ‘fogging’ of the wood or the loose glazing beads that indicate the seal is gone.
In northern climates where the U-factor is the primary concern, the wood frame actually acts as a natural thermal break. Wood has a much lower thermal conductivity than uninsulated aluminum. However, a single pane of glass has an abysmal U-factor of roughly 1.0. We aren’t aiming for modern R-values here; we are aiming for a weather-tight seal that prevents air infiltration. When you are performing a window repair, you are essentially restoring the airtightness of the assembly. The glass must be bedded in a thin layer of putty, a process known as ‘back-bedding.’ This ensures that no air can leak between the glass and the wood, which is the most common source of those freezing January drafts.
Step-by-Step Restoration Protocol
First, you must remove the sash from the frame. Trying to glaze a window while it is vertical is a recipe for a sloppy finish and poor adhesion. Once the sash is on your bench, use a heat gun with a shield to soften the old putty. Be extremely careful not to scorch the muntin—those are the thin strips of wood that divide the individual panes. Once the old glass is out, the rabbet must be primed. This is a step most amateurs skip. Raw wood will suck the oil right out of your new glazing putty, causing it to fail prematurely. Use a high-quality oil-based primer to seal the wood first.
Next, apply a thin bead of glazing compound into the rabbet. This is your gasket. Lay the new pane of glass into the opening and press firmly until the compound ‘oozes’ out the back. You are looking for a continuous seal with no voids. Now, you need glazier points. These are small metal triangles that you drive into the wood to hold the glass in place. I recommend spacing them every six inches. Without these points, the putty is the only thing holding the glass, and putty is not a structural adhesive; it is a sealant.
“Proper flashing and sealants are the only defense against the intrusion of bulk water into the building’s structural components.” – ASTM E2112 Standard Practice
The final step is the ‘glazing bead’ of putty on the exterior. This is where the skill of the master glazier shows. You want a sharp, clean line that follows the edge of the wood exactly. This beveled edge is designed to shed water away from the glass and onto the wooden sill. If the angle is too shallow, water will pool. If it’s too steep, it won’t provide enough coverage for the glass edge. After you have tooled the putty, it needs time to ‘skin over’ before painting. Depending on the humidity and temperature, this could take anywhere from three days to two weeks. Do not rush this. If you paint too early, the oils will be trapped, and the putty will never harden, leading to a gummy mess that a window cleaner’s squeegee will ruin instantly.
Thermal Logic in Cold Climates
In regions like Chicago or Minneapolis, the primary enemy is the dew point. When warm, humid air from inside the house hits the cold surface of a single pane of glass, it condenses. This liquid water then runs down the glass and collects on the bottom rail and the muntins. This is why your window repair must be perfect. If your back-bedding is solid, the water stays on the glass where it can be wiped away. If the seal is broken, that water gets into the joinery of the sash, leading to the rot I mentioned earlier. While a single pane will never compete with a triple-pane argon-filled unit in terms of radiant heat reflection, a well-maintained wood window with a high-quality storm window can achieve a U-factor that rivals many modern mid-range replacements. The air gap between the primary sash and the storm window acts as an insulating buffer, significantly reducing the convective heat loss that makes a room feel ‘drafty.’
The Real ROI of Repair
Many homeowners are told that they should replace windows to save money on energy bills. Let’s look at the math. A full house of replacement windows can cost $20,000 to $40,000. If they save you $300 a year in heating costs, the ROI is measured in decades, not years. Most vinyl windows will have seal failures in their insulated glass units (IGUs) long before they pay for themselves. Conversely, a single pane of glass costs about $10, and a tub of glazing putty is $15. By learning how to perform your own window repair, you are preserving a high-quality architectural feature while spending a fraction of the cost. You aren’t just fixing a window; you are maintaining the structural integrity of your home’s envelope. Focus on the seal, respect the materials, and never underestimate the importance of a properly tooled glazing bead.