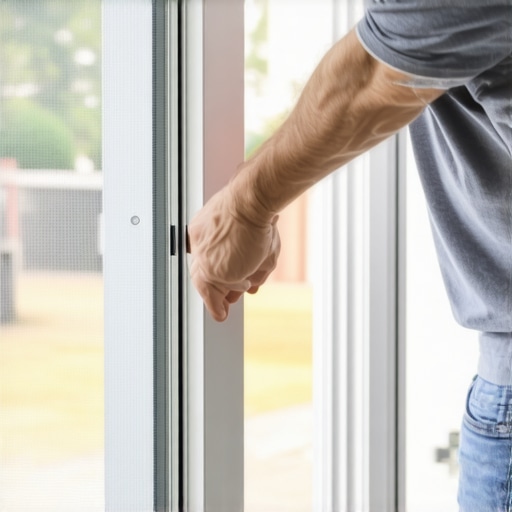
The sound is unmistakable: a sharp, violent crack that resonates through the framing of your house, often followed by the rattling of nearby window sashes. As a glazier with over two decades in the field, I have heard this sound more times than I can count. Homeowners usually ignore it until the glass in their storm door cracks or the hinges begin to pull out of the wood. A slamming screen door is not just an annoyance; it is a mechanical failure of the entryway system that puts undue stress on the Rough Opening and can eventually lead to a costly window repair or full door replacement. If you have noticed your door acting erratically, it is time to stop the ‘caulk-and-walk’ mentality and understand the fluid dynamics and mechanical tolerances at play.
The Condensation Crisis: A Narrative of Pressure
A homeowner once called me in a panic because their new storm windows and entryway door were ‘sweating’ and the door refused to close quietly despite multiple adjustments. I walked in with my hygrometer and showed them the humidity was hovering at 62 percent. It was not the door’s hardware that was failing initially; it was their indoor climate. The high moisture content was swelling the wood jamb, causing the door to bind at the top. To compensate, the husband had cranked the pneumatic damper to its maximum force to ‘slam’ the door shut through the resistance. I had to explain that they were essentially trying to force a square peg into a round hole. This resulted in the damper’s internal seals blowing out, leading to the very slam they were trying to avoid. Before we even touched a screwdriver, we had to address the dehumidification of the home to bring the Rough Opening back to its intended dimensions.
“Proper installation of fenestration components requires a rigid substrate and precise leveling to ensure the longevity of moving parts like closers and hinges.” – ASTM E2112 Standard Practice
The Anatomy of the Pneumatic Damper
To fix a slam, you must understand the ‘Glazing Zooming’ of the damper itself. Most residential screen doors utilize a pneumatic closer—a cylinder filled with air and a heavy-duty internal spring. When you open the door, you are compressing that spring and drawing air into the cylinder through a check valve. When you let go, the spring wants to recoil instantly. The only thing stopping it from snapping the door shut is the air trapped inside. The adjustment screw at the end of the cylinder is actually a needle valve. By turning it, you are changing the size of the orifice that the air must escape through. A smaller orifice creates higher backpressure, slowing the door’s travel. This is fluid dynamics in its simplest form. If the door slams, the orifice is too large, or the internal piston seal—often a leather or synthetic cup—has dried out and is allowing air to bypass the valve entirely. This is why a simple window cleaner or lubricant on the rod can sometimes temporarily help, but usually, the seal is the culprit.
Climate Logic: The North’s Impact on Closing Speed
In cold climates like Chicago or Minneapolis, the physics of your screen door change seasonally. We talk about the U-Factor and heat loss when we replace windows, but we rarely discuss the viscosity of air and lubricants in a door closer. In the winter, the air is denser, and any trace of oil inside the damper becomes more viscous. A door that closed perfectly in July will likely crawl in January. Conversely, if you tune it for the winter, it will become a guillotine by June. This is why high-performance closers are essential. For those in the North, the ‘Enemy’ is the fluctuating density of the air within the cylinder. You want a damper that allows for ‘seasonal tuning.’ Furthermore, if your door is not properly shimmed within the opening, the cold can cause the metal frame to contract at a different rate than the wood house framing, leading to a ‘bind’ that the damper cannot overcome without excessive force.
The Installation Autopsy: Why They Fail
Most slamming doors are the result of poor initial installation. When I perform a ‘Replacement Reality Check,’ I often find that the installer failed to use a Shim behind the closer bracket. If the bracket is mounted to a soft wood casing without a solid backing, it will flex every time the door opens. This flex absorbs the energy that should be going into the pneumatic compression. Over time, the screws pull out, the angle of the cylinder changes, and the geometric advantage of the swing arm is lost. This is what we call mechanical fatigue. You must also ensure the Weep Hole at the bottom of the storm door frame is clear. If water traps at the sill, it can wick into the subfloor, rotting the Sill Pan and causing the entire frame to sag. A sagging frame means the door will never latch correctly, no matter how much you turn that adjustment screw.
“Installation is just as critical as the window performance itself. A high-performance window installed poorly will fail.” – AAMA Installation Masters Guide
The Step-by-Step Adjustment Protocol
First, inspect the Operable parts of the door. Check the hinges for ‘knuckle scrub’—metal shavings that indicate the door is hanging crooked. If the hinges are sound, move to the closer. To adjust the speed, locate the screw on the end of the cylinder. Turn it clockwise to slow the door down (closing the orifice) or counter-clockwise to speed it up. You are looking for a two-stage motion. The door should swing quickly through the first 80 percent of its arc, then slow down significantly for the ‘latch zone’—the last few inches before it hits the strike plate. If your door has two closers (one at the top and one at the bottom), they must be synchronized. If one is pulling harder than the other, you will warp the door’s Sash, leading to air leaks that negate the energy-saving benefits of the door. This is a common issue when homeowners try to perform a DIY window repair on their entryway without understanding the tension balance required.
The Math of the Latch Zone
The ‘Latch Speed’ is critical. If the door closes too slowly at the very end, it won’t have enough momentum to click the latch into the strike plate. This leaves the door flapping in the wind, which is the leading cause of broken glass in storm doors. You want the door to ‘snap’ shut only in the final inch of travel. If you cannot achieve this balance, it is likely that the mounting bracket is in the wrong position on the door frame. Moving the bracket just half an inch can change the leverage ratio significantly. This is the difference between a professional install and a ‘Tin Man’ rush job. Ultimately, if the cylinder is leaking oil or if you hear a ‘hissing’ sound that doesn’t change when you turn the screw, the internal diaphragm is dead. At that point, do not bother with repairs; replacement is the only viable path to protecting your home’s Rough Opening from the structural shock of a slam.